Blog
Latest posts from Upsampler.
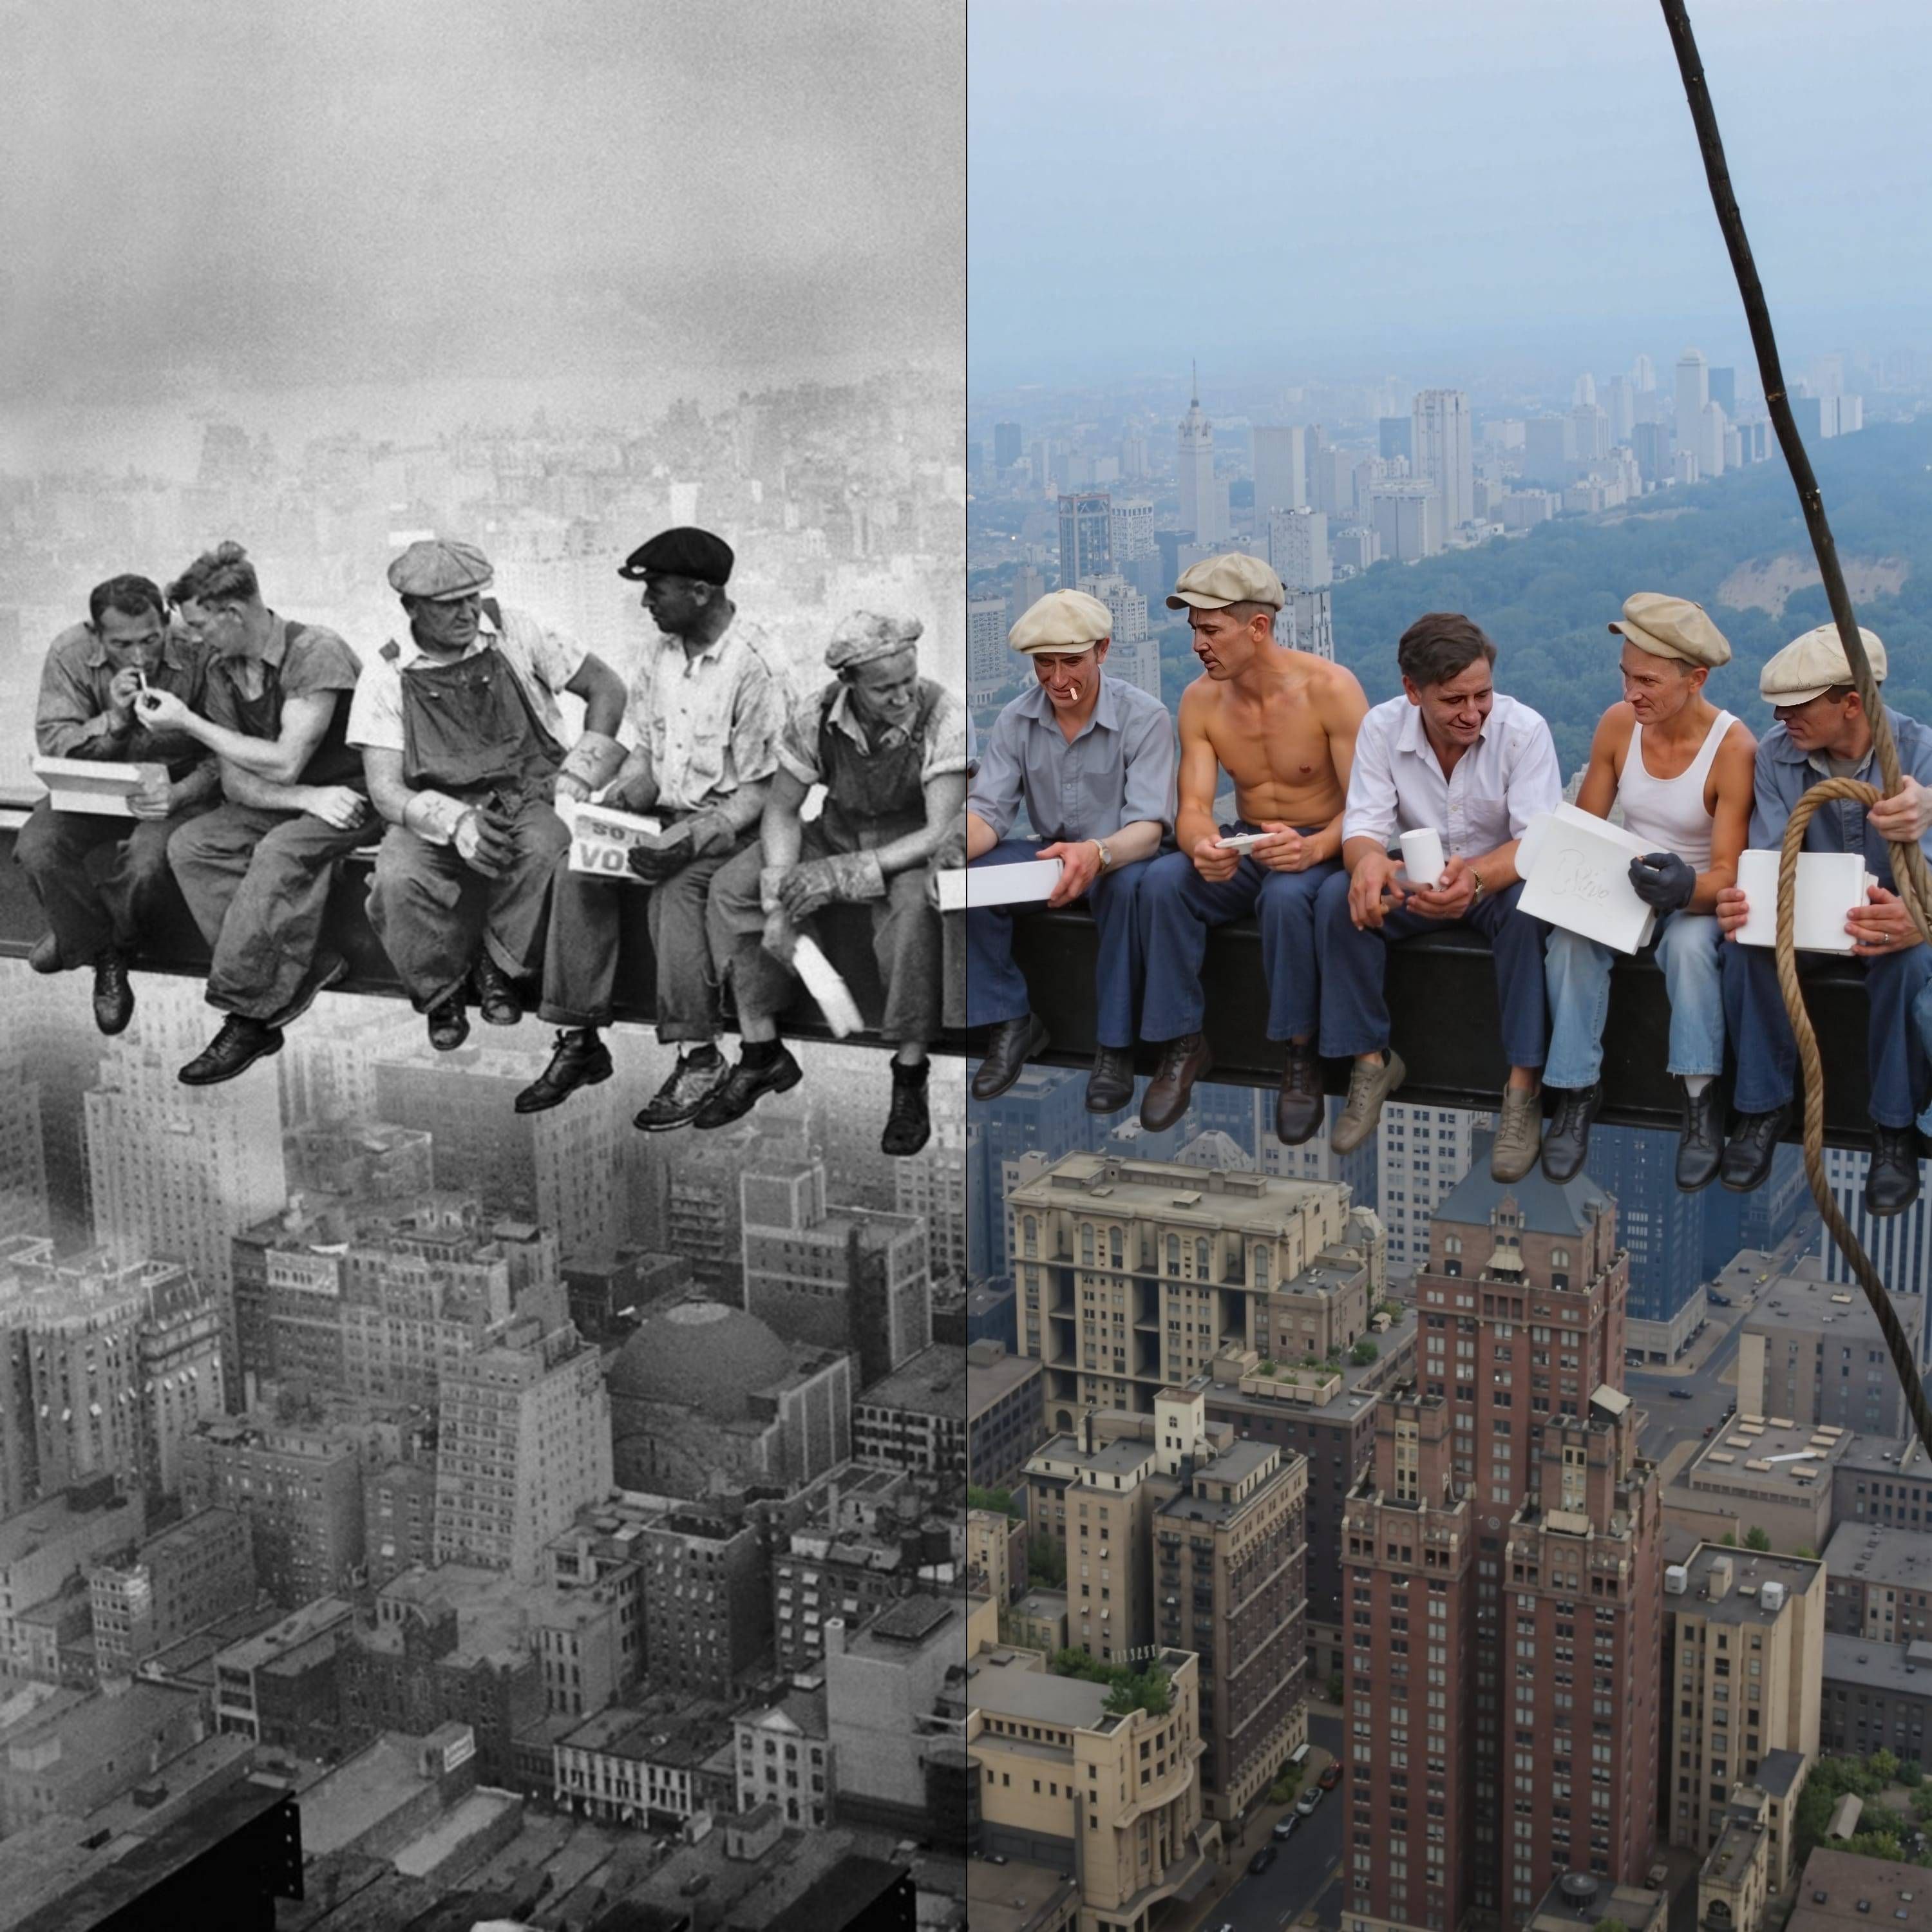
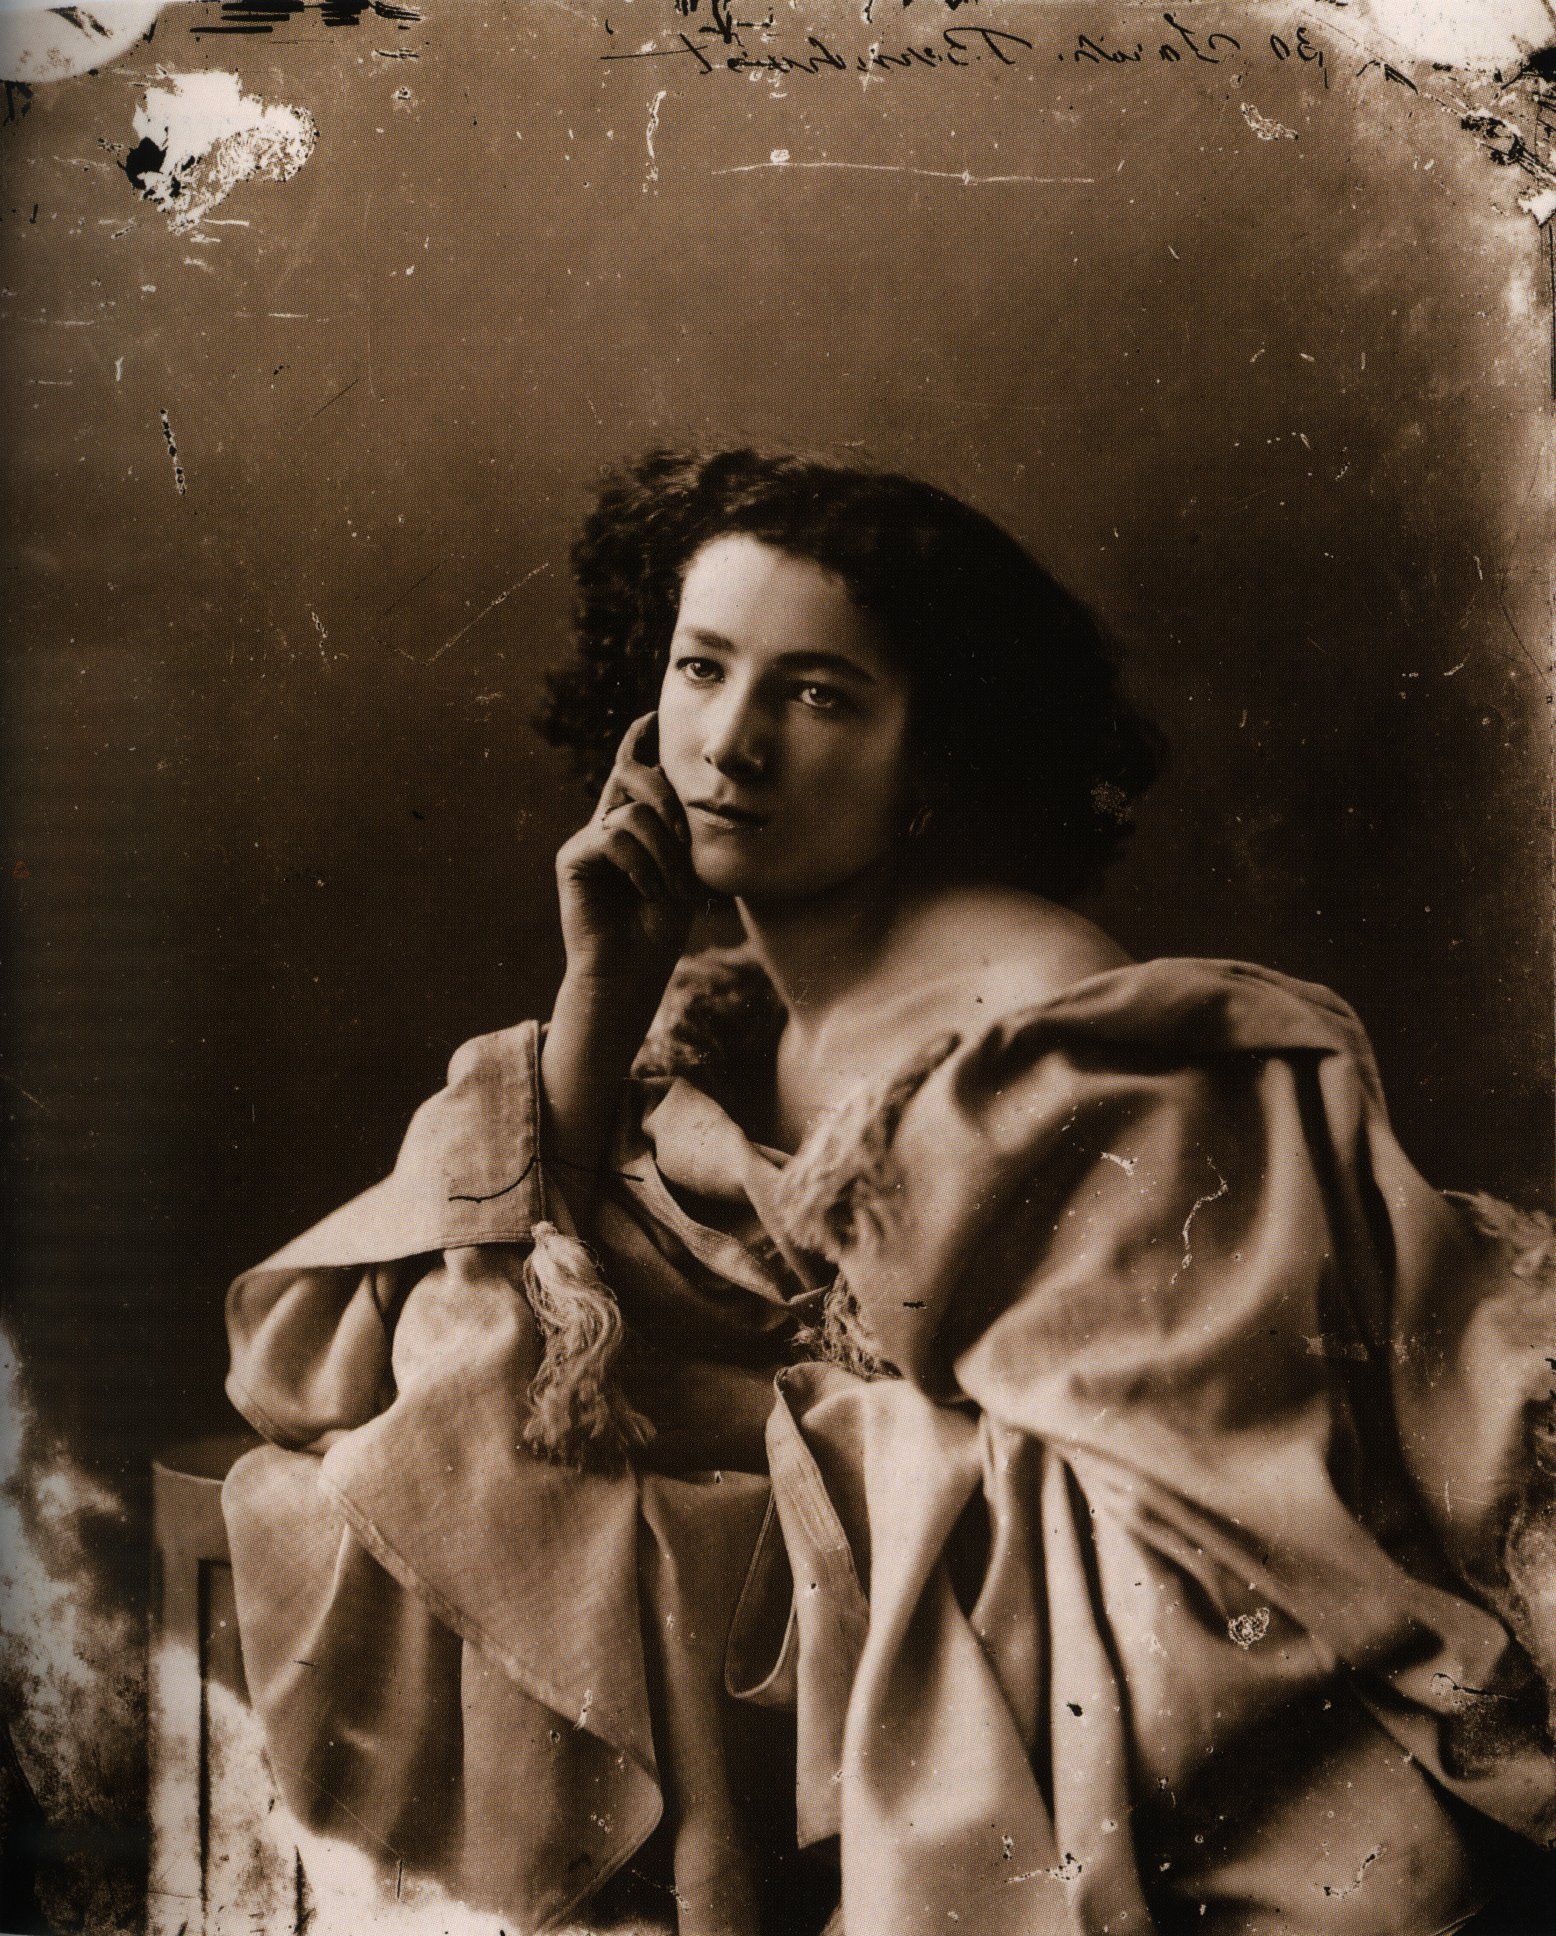
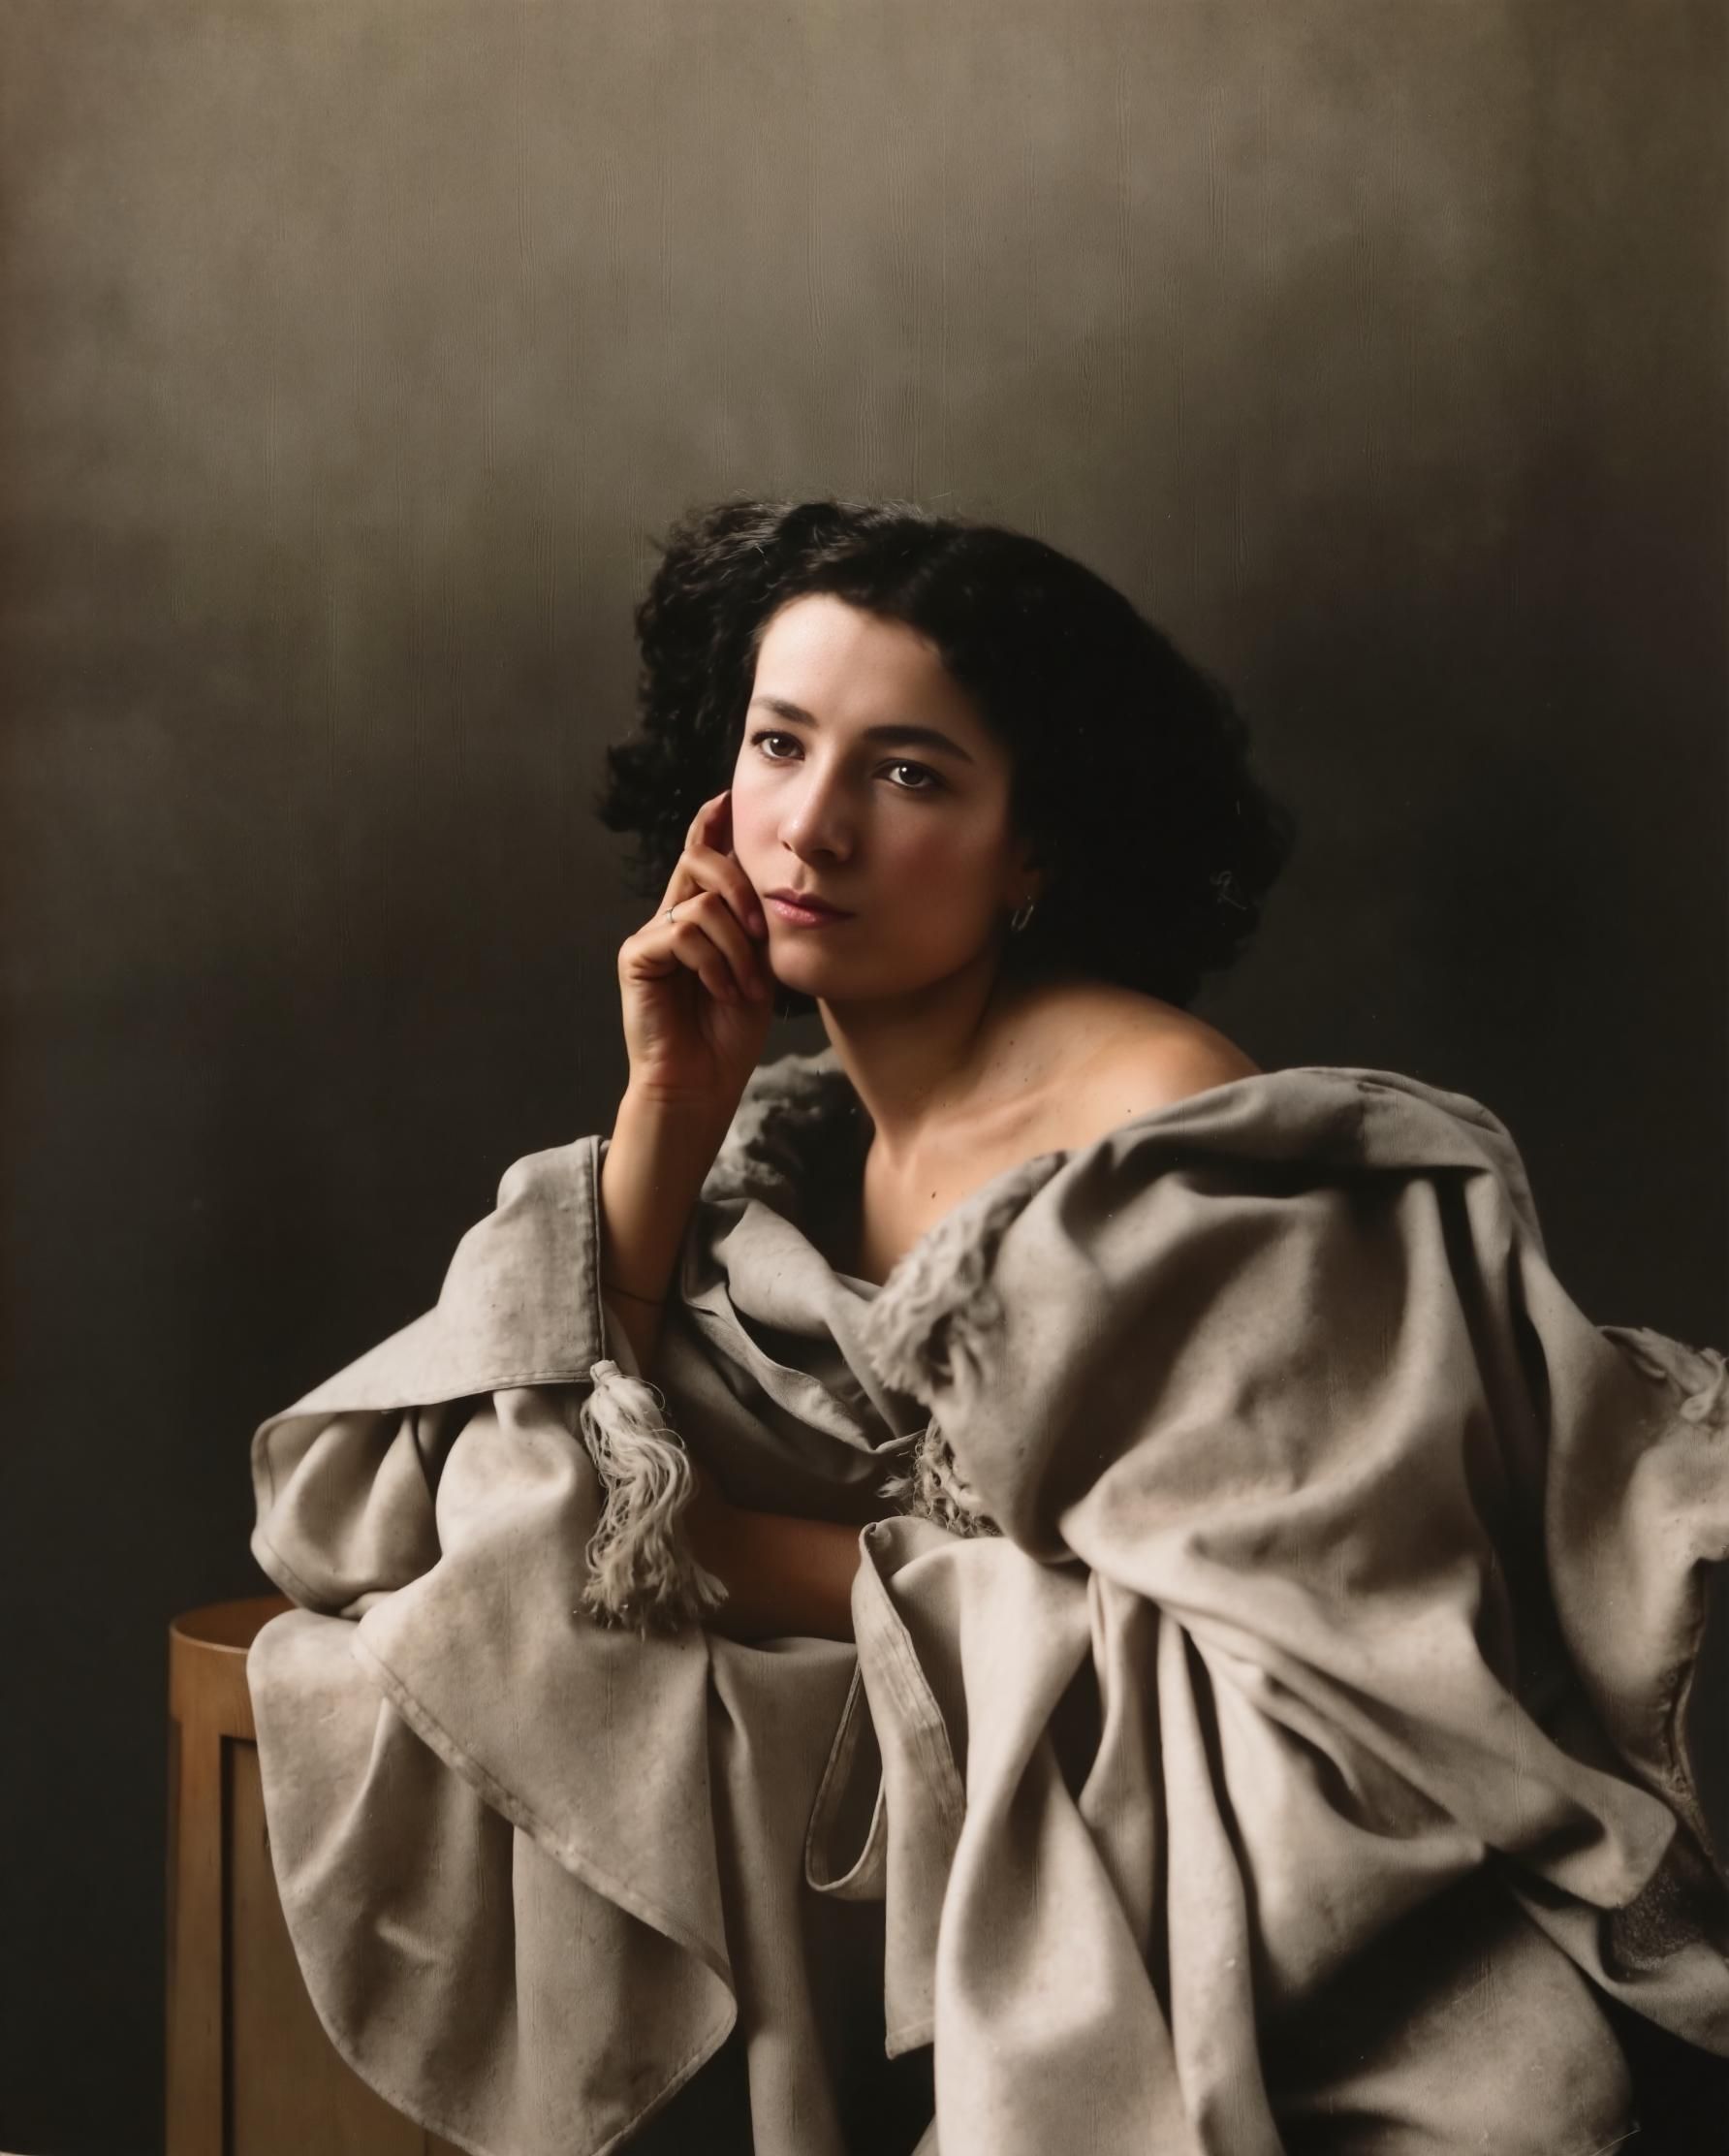
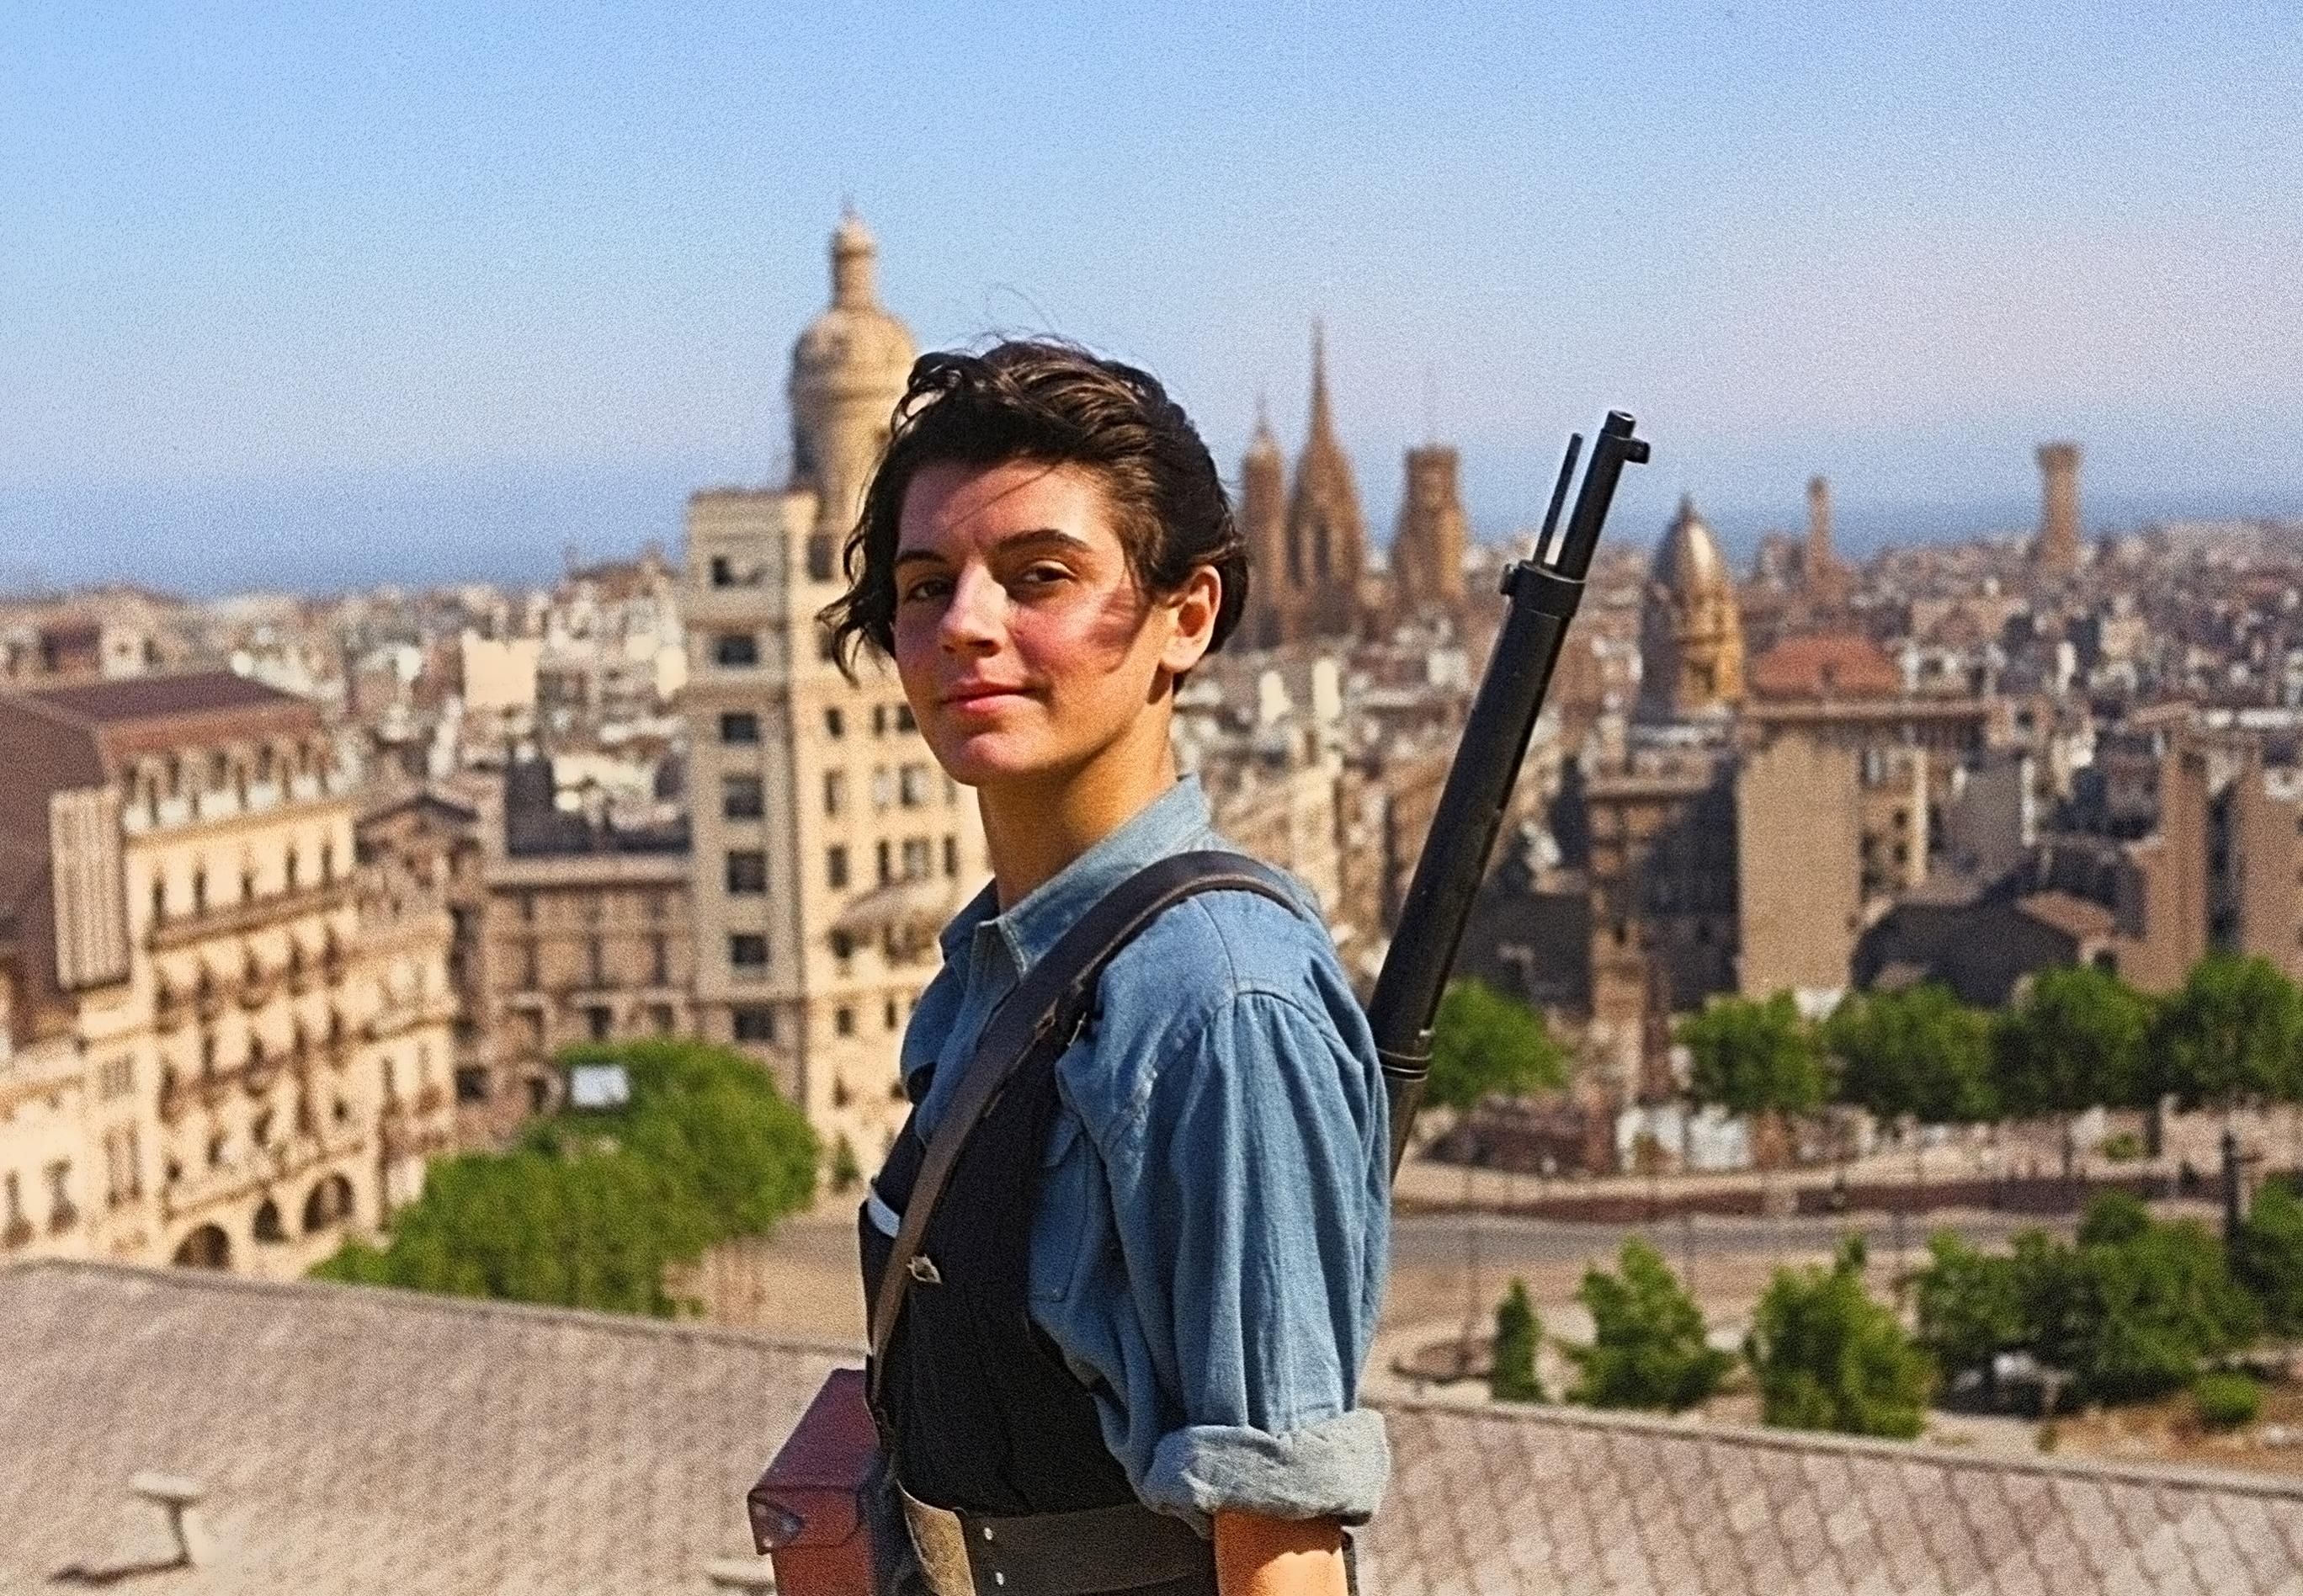
Repair and Colorize Old Photos for Printing Online (Canvas, Posters, and Other Wall Art)
Bring torn, faded, or discolored photos back to life with our professional restoration service. The automated AI tool fixes rips and cracks, revives lost details, and adds vivid color, turning low-quality portraits into high-resolution images that look great on canvas, posters, and any other wall art format.
Admin
@lucak5s
Introduction: Preparing Old Photos for Modern Printing
Many physical photographs from past decades are unsuitable for high-quality printing. Beyond common damage like tears and fading, they typically have insufficient resolution for enlargement. Printing an old 4x6 photo as a larger piece of wall art would normally result in a blurry, pixelated image.
This guide provides a technical workflow to solve this problem. Using AI-powered tools, you can repair physical damage, correct colors, and upscale the image resolution to meet the standards required for sharp, large-format printing.
The Technical Requirements for Quality Large-Format Prints
Before printing, a digital image file must meet specific criteria regarding its condition and resolution.
-
Damage Repair: Enlarging a photo magnifies every flaw. Scratches, dust, creases, and chemical stains that are barely noticeable on a small print become prominent and distracting on a large canvas or poster. These artifacts must be digitally removed.
-
Print Resolution (DPI): The industry standard for high-quality photo printing is 300 DPI (Dots Per Inch). This means for every inch of the print, there should be 300 pixels of data in the digital file.
- Example: To create a sharp 16x20-inch print, your digital file must be at least
4800 × 6000pixels (16 inches × 300 DPIand20 inches × 300 DPI). Most old photos, when scanned, fall far short of this requirement.
- Example: To create a sharp 16x20-inch print, your digital file must be at least
-
Color Accuracy: Over time, the chemicals in photo paper degrade, causing color shifts (e.g., a yellow or magenta tint) and fading. A proper restoration process either restores the original color balance or, in the case of monochrome images, can add realistic color through AI colorization.
A Practical Workflow for Print Preparation
Follow these four steps to convert your physical photograph into a print-ready digital file.
Step 1: Digitize Your Photograph at High Resolution
Create a high-quality digital copy to serve as your baseline.
- Recommended Method (Flatbed Scanner): Scan your photo at a minimum resolution of 600 DPI. This captures the maximum amount of source detail from the physical print, providing more data for the AI to work with.
- Alternative (Smartphone): If a scanner is unavailable, use an app like Google PhotoScan. Place the photo on a flat surface in bright, indirect light to eliminate glare and ensure the camera is perfectly parallel to the photo to avoid distortion.
Step 2: Repair Damage and Colorize with the AI Restoration Tool
This step addresses physical damage and color issues using a specialized AI model.
- Navigate to the Upsampler AI Image Restoration Tool.
- Upload your scanned image file.
- Select the image type, such as 'Realism' for photos.
- Select the restoration mode. If you want maximum accuracy and only wish to colorize, choose 'Colorize Only.' Otherwise, choose 'Repair and Colorize.' If your image already has color, select 'Repair Only.'
- It's highly recommended to write an image description for the colors and objects.
- If the image has small faces, enable 'Preserve Small Faces' to better maintain facial identity.
The tool's neural network identifies and inpaints imperfections like cracks and scratches. It simultaneously improves sharpness and offers an option to apply context-aware color to black-and-white photos. Download the resulting repaired image.
Step 3: Upscale the Image to Print Resolution
After repairs, the next critical step is to increase the image's pixel dimensions to meet the 300 DPI standard for your target print size. Normal upscalers often cannot add enough new information to reach ultra-high resolutions. This is not the case with Upsampler.com's upscalers. They can generate new details at any resolution, enabling upscaling without limits.
- Take the repaired image from Step 2.
- Use one of Upsampler's AI upscaling tools. We recommend the Smart Upscaler. Experiment with the settings for optimal results. These tools intelligently add pixels to enlarge the image without the blurriness of traditional resizing methods.
- Calculate your required dimensions (e.g., for a 16x20-inch print, upscale the image to at least
4800 × 6000pixels) and run the tool.

Step 4: Download the Final, Print-Ready File
You now have a single file that is free of damage and has the necessary pixel density for high-quality printing. Save this final version for uploading to a print service.
Choosing the Right Print Medium
The final appearance of your wall art depends heavily on the material it's printed on.
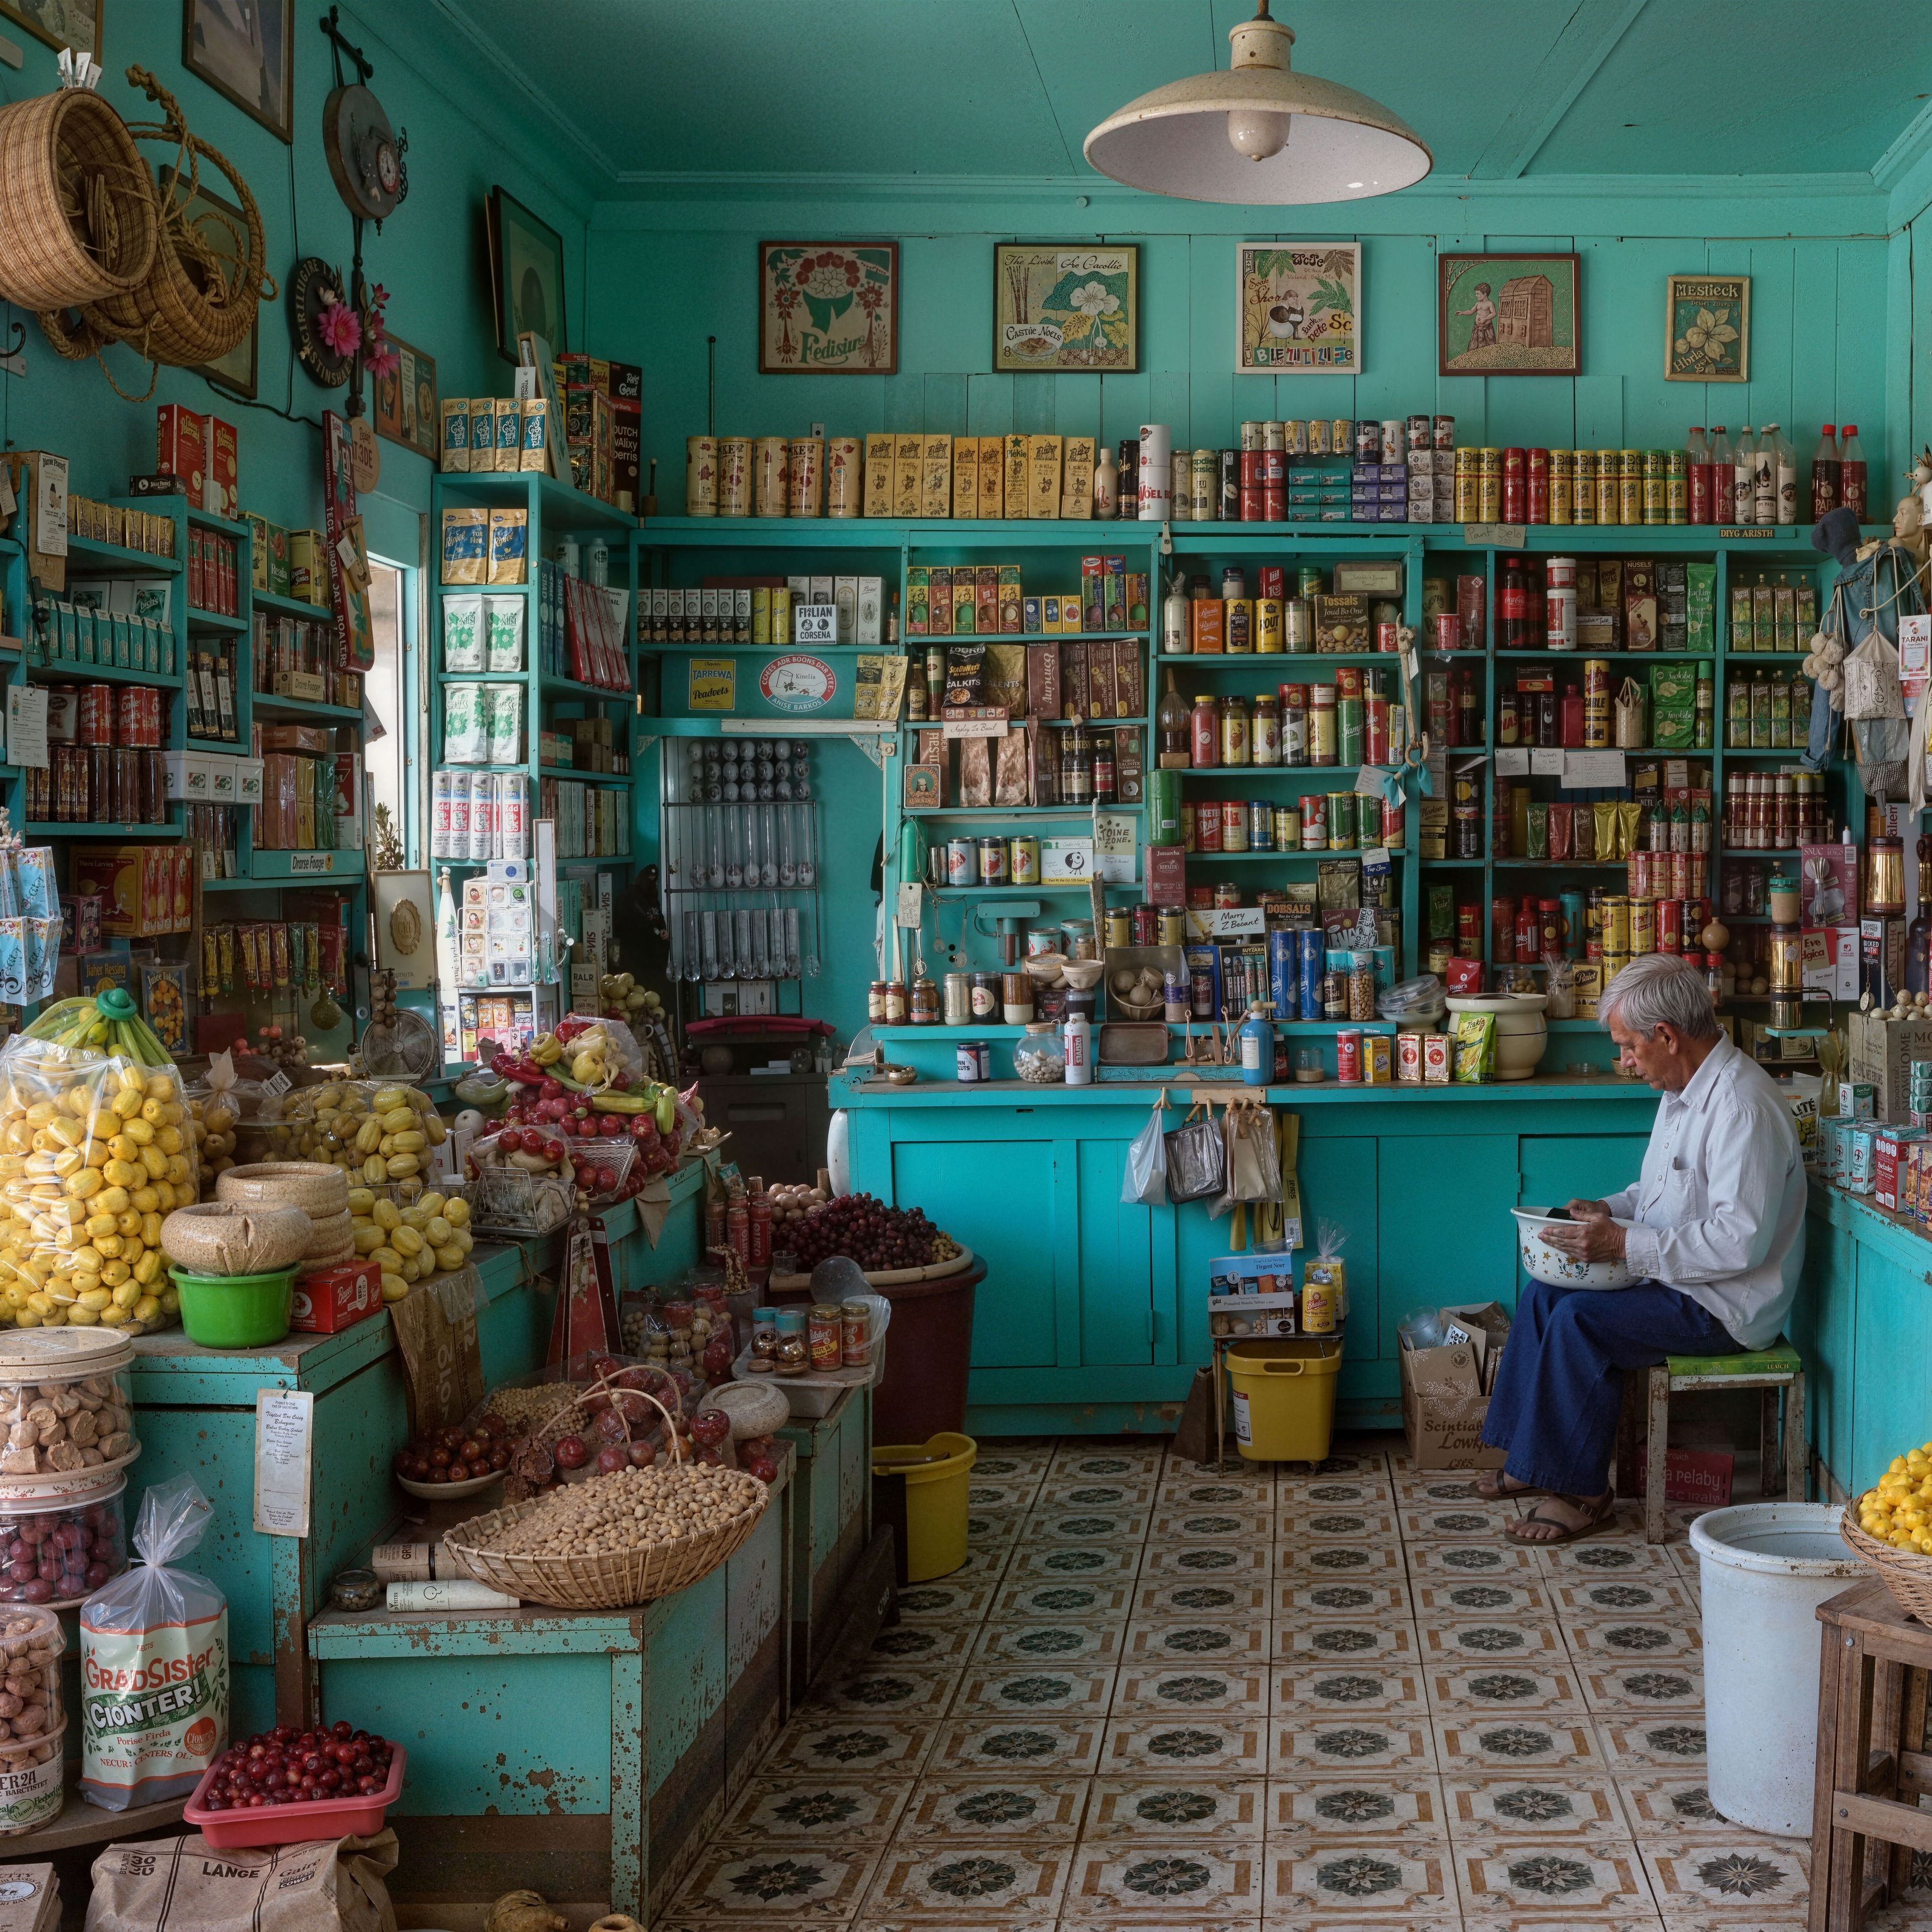
- Canvas Prints: Suitable for images with a softer focus or a classic, painterly aesthetic. The woven texture of the canvas can be forgiving for images that are not perfectly sharp, and the gallery-wrapped format does not require framing.
- Framed Prints / Posters: Ideal for high-detail, sharp images. Smooth photo paper (in matte, luster, or glossy finishes) preserves maximum detail. A matte finish is recommended to minimize reflections and fingerprints.
How to Print Your Restored Photo Using Printify
For printing, a service like Printify provides access to a network of professional printers.
Why Printify is a practical choice:
- It offers a wide selection of substrates (canvas, various paper types, acrylic, metal) from different print providers.
- Its interface is straightforward for uploading custom images and previewing them on the final product.
- It's designed for single-item orders ("print-on-demand"), making it ideal for personal projects.
Simple Printing Guide:
- Navigate to the Printify website and create an account.
- Click "Create product" and choose the type of product (Canvas, Poster, ...) you want to create. Then click "Start Designing" to open the mock-up tool.
- Upload the final, high-resolution image file you prepared with Upsampler's tools.
- Position the image. Crucially, pay attention to the "safe zone" or "print area" in the designer to ensure that no important details are trimmed during production.
- Confirm the preview and place your order.
Conclusion
By following a methodical workflow (digitize, repair, upscale, and print) it is straightforward to convert aging physical photographs into durable, high-quality wall art. This process effectively overcomes the limitations of older photo formats, allowing you to preserve them for modern display.
To begin preparing your images for printing, start with the tools designed for the job.
More Articles
Increase DPI of Image Online without Losing Quality! Change Images to 300 DPI or More!
Discover how to effectively increase the DPI of your images online for free or with advanced AI tools. Learn to change images to 300 DPI or more for stunning, print-ready results without losing quality.
May 12, 2025
How to Bulk Upscale Thousands of Images with the Creative Enhancemet API
Upscale and regenerate a high volume of images at large resolutions with a bulk creative upscaling API. Ideal for enhancing AI-generated and synthetic images, creating datasets, or producing marketing visuals with improved skin texture.
July 20, 2025